


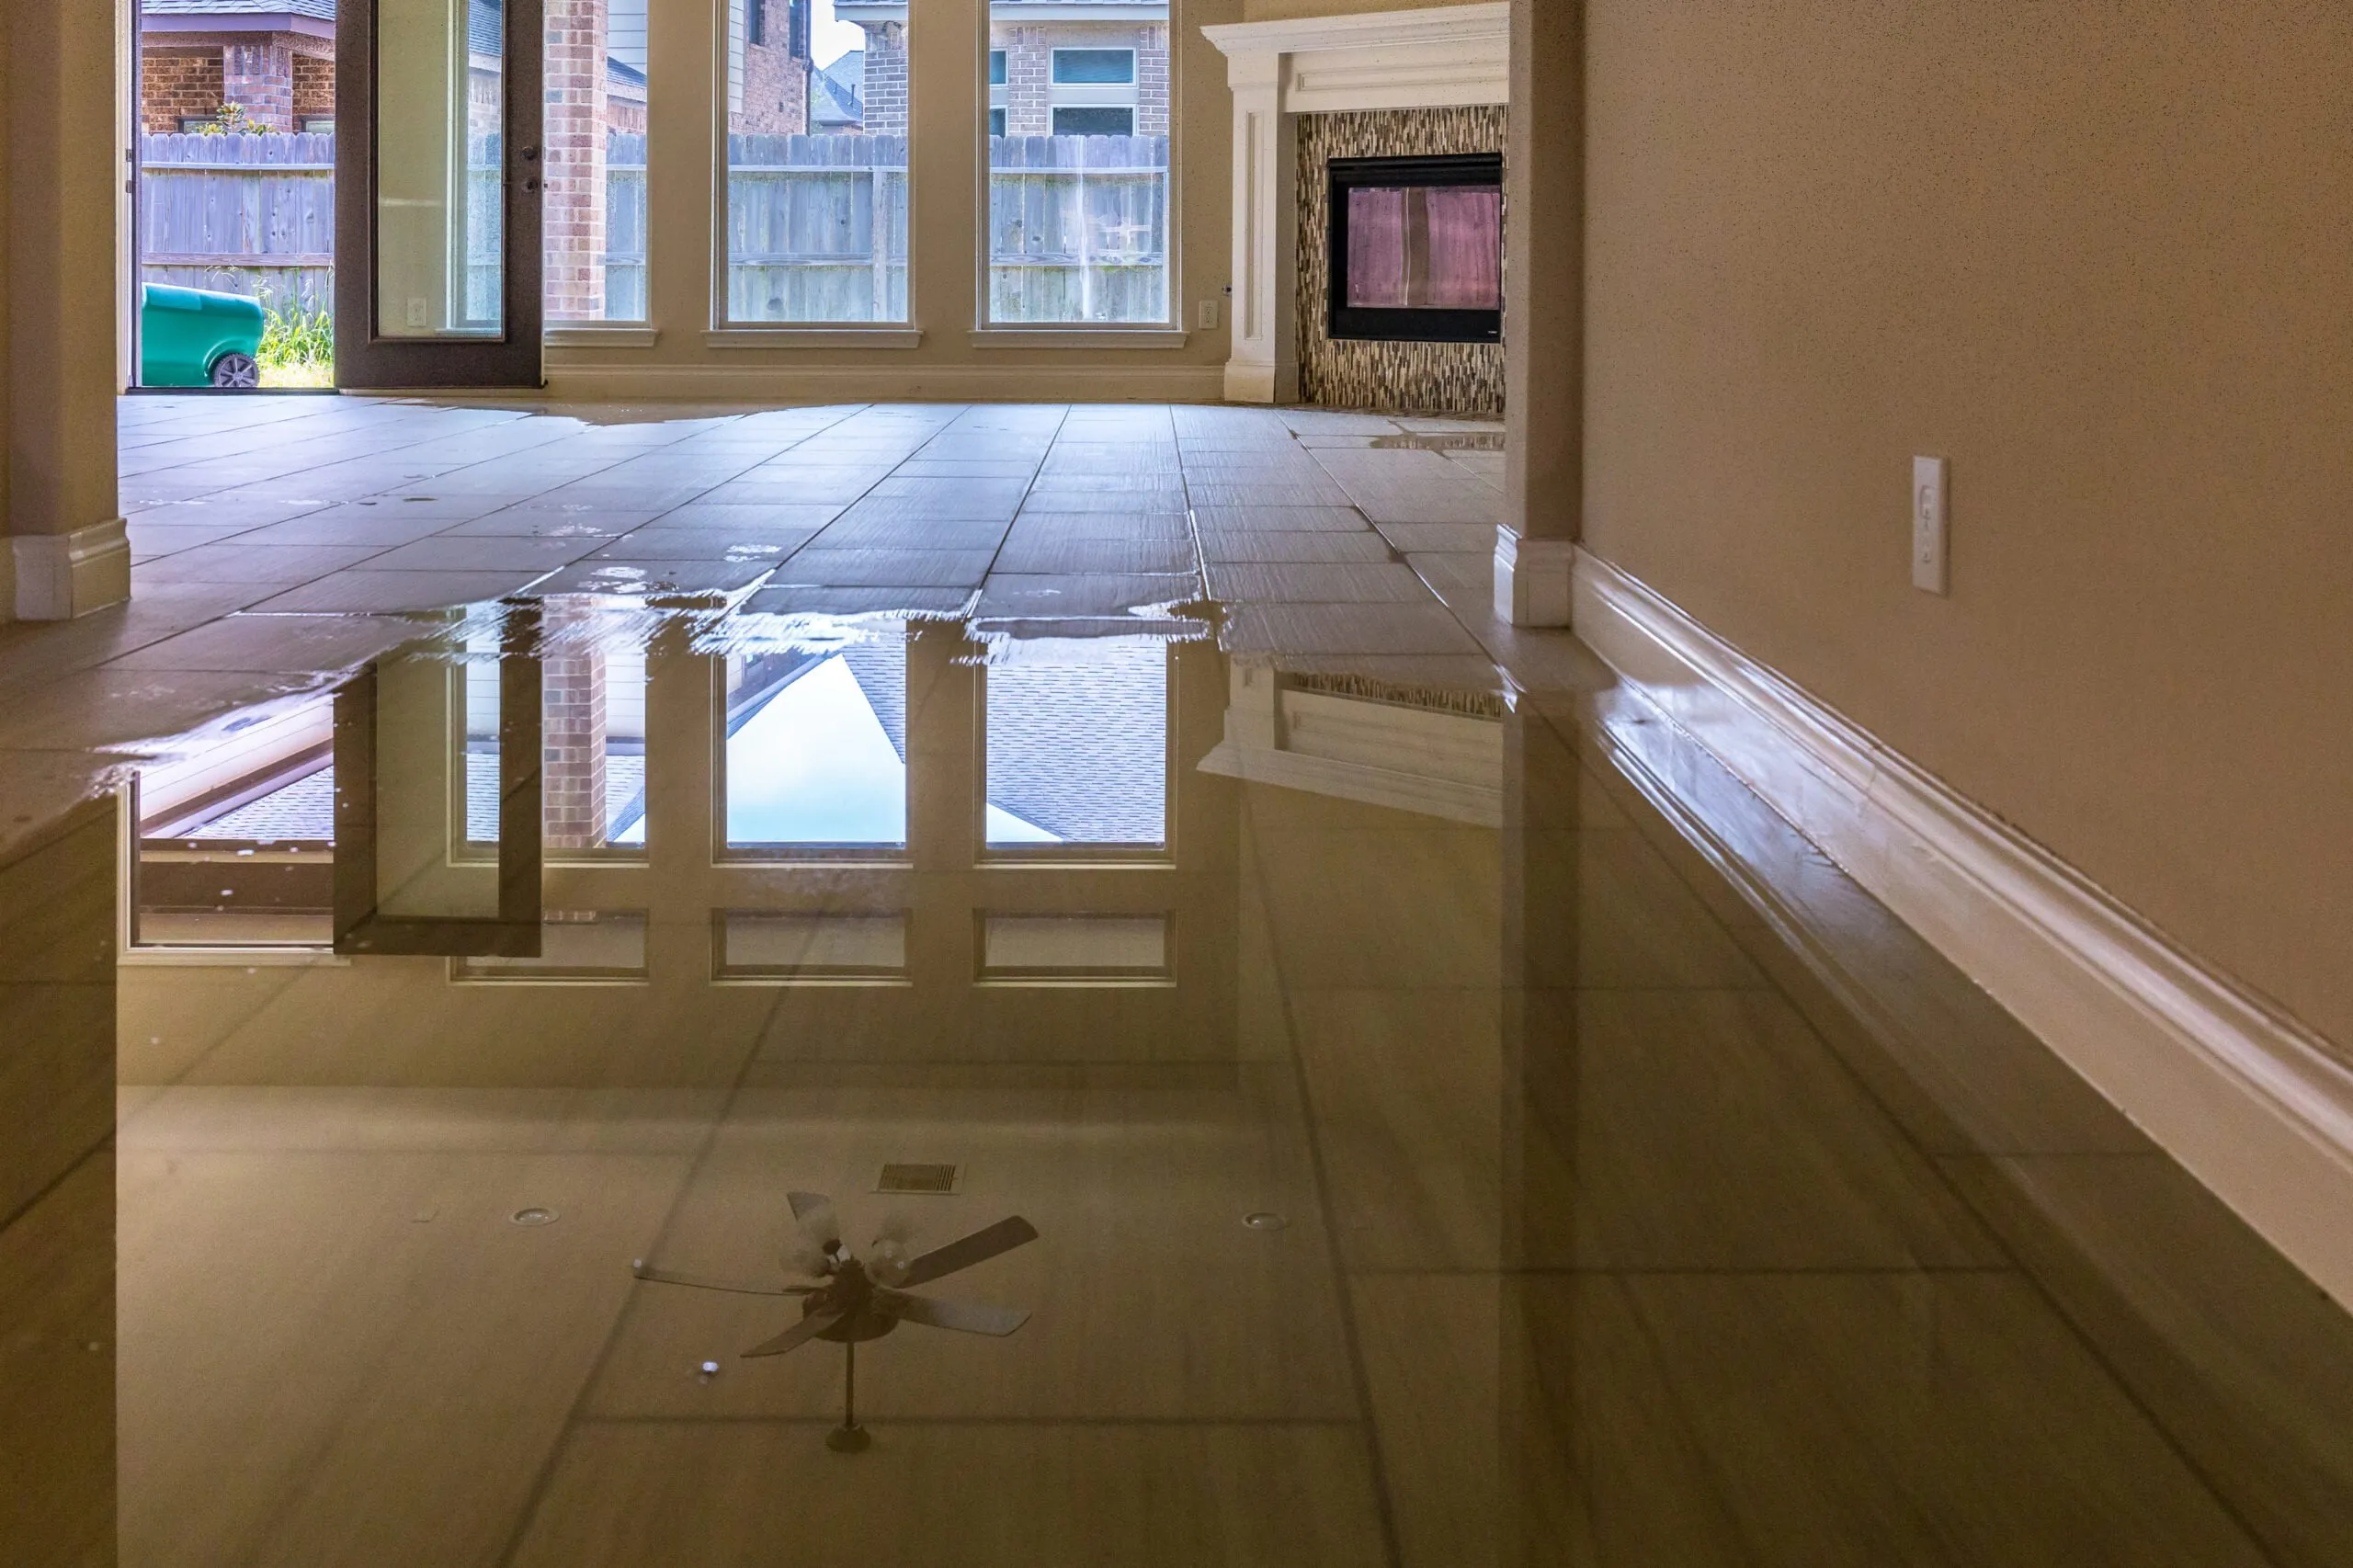
It’s every home owner’s worst nightmare. You arrive on your doorstep tired after a long day shuffling kids off to school and putting out fires at work. After unlocking the door, you experience unexpected pushback as you try to open it.
Then suddenly, it swings open, and water floods out onto your front porch. You step inside to the squish of soaked carpet under your feet and a line of water damage up your walls.
As you rush to shut off the home’s water supply, you feel a sense of relief. But you realize this is only the beginning of the ordeal.
Now comes the water mitigation process. The actions you take now are critical. You must reduce the humidity fast or risk greater damage of black mold and mildew.
Here’s how to proceed to reduce your losses and begin the cleanup process.
Causes of Water Damage in Homes
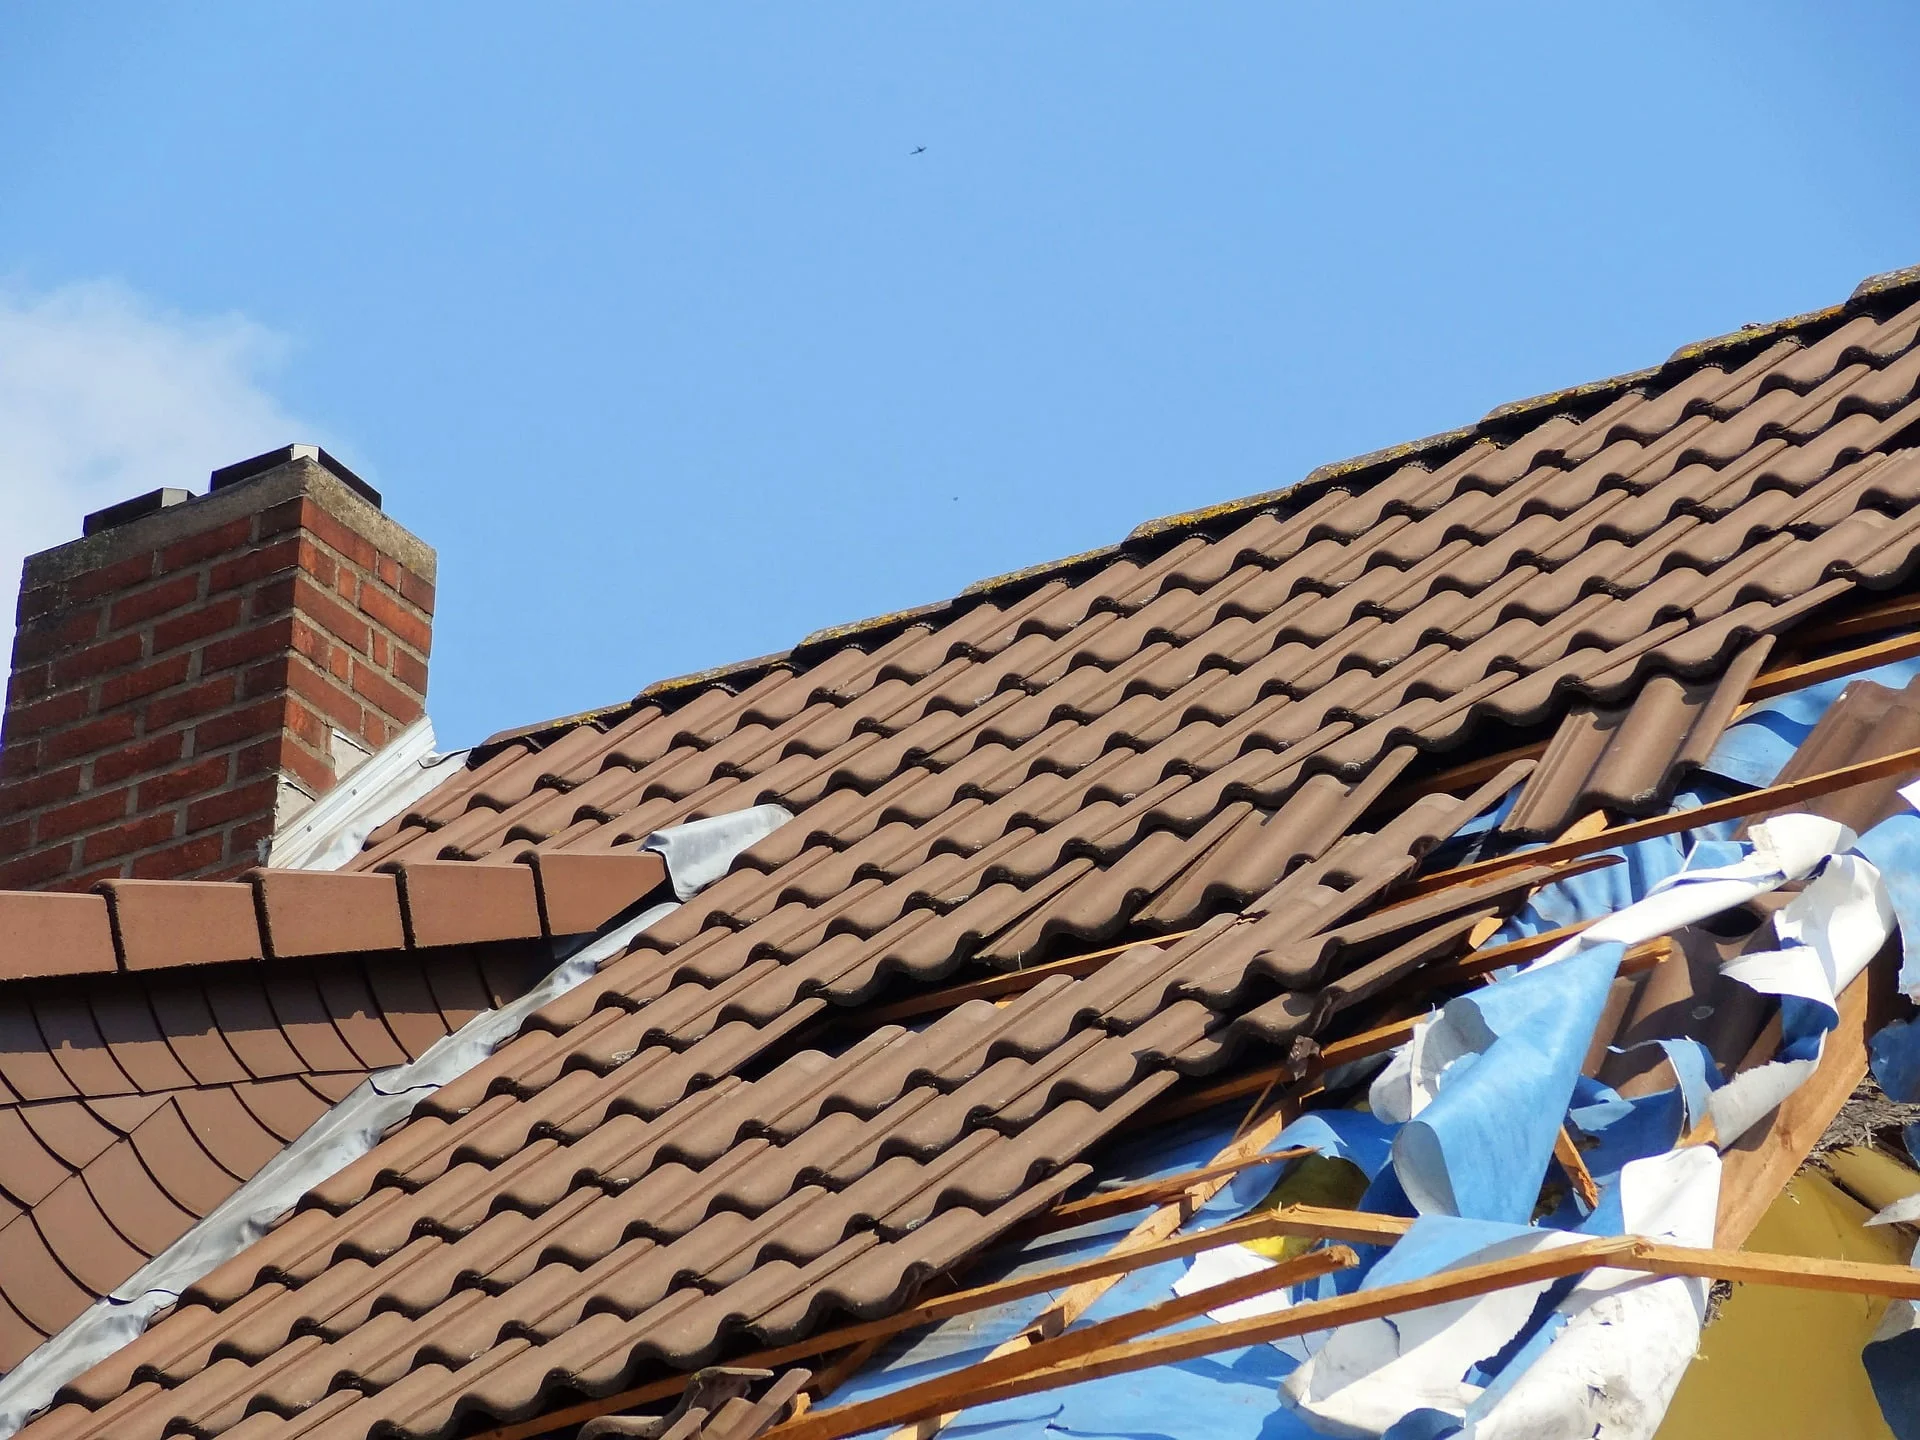
While the above scenario might be the most unexpected way for water damage to happen in your home, it’s also the most impactful. Pipes break, valved fail, and water damage can occur at any time in the modern home, due to:
- Flooded basement
- Faulty toilet line
- Roof damage
- Frozen pipe
- Natural disasters
- Flood damage
- Broken water supply line or nozzle
- Dishwasher blockage
- Excessive debris in a gutter or downspout
What Does Water Mitigation Cost?
According to HomeAdvisor, the average cost to clean up a water-damaged home in 2021 is $1,202 – $5,104. But could exceed $12,000. This price tag can, of course, vary greatly, and doesn’t include a complete restoration.
Is the water damage isolated to one room or section of your home? Do walls, floors, or ceilings have to come out to properly dry the damage? Your answers will impact the final price tag.
And little details can make a price difference. For example, laminate flooring is surprisingly more expensive to restore than hardwood because it soaks up water and holds moisture on the subflooring, rotting it. Wet outer walls cost more than inner walls.
The costs can quickly add up. Here’s a breakdown of some of those costs.
Costs Based on Types of Water Damage
Water mitigation companies typically classify water damage into three primary categories:
- Category 1: Clean water (e.g. a discharge from a water supply on the washing machine or toilet). It’s freshwater, so not generally dangerous.
- Category 2: Gray water (e.g., a roof leak, water from the shower, laundry, dishwasher, sink before it reaches the sewage, at which point it would become black water). This water is yucky, but a little less dangerous. However, note that what seems like gray water may, in fact, be black. Only a licensed water mitigation professional can make this determination based upon industry standards.
- Category 3: Blackwater (e.g., sewage backup, toilet backup. water flowing in off the street/yard) has a higher risk of disease-causing pathogens.
As you can imagine, it is more expensive to do water mitigation on dirty water because of the health risks involved and the saturation of walls, carpets, etc. with possible fecal bacteria.
Here are some estimates for cleanup only based upon the type of water you’re dealing with:
- Clean Water – $3.75 per square foot
- Gray Water – $4.50 per square foot
- Black Water – $7 per square foot
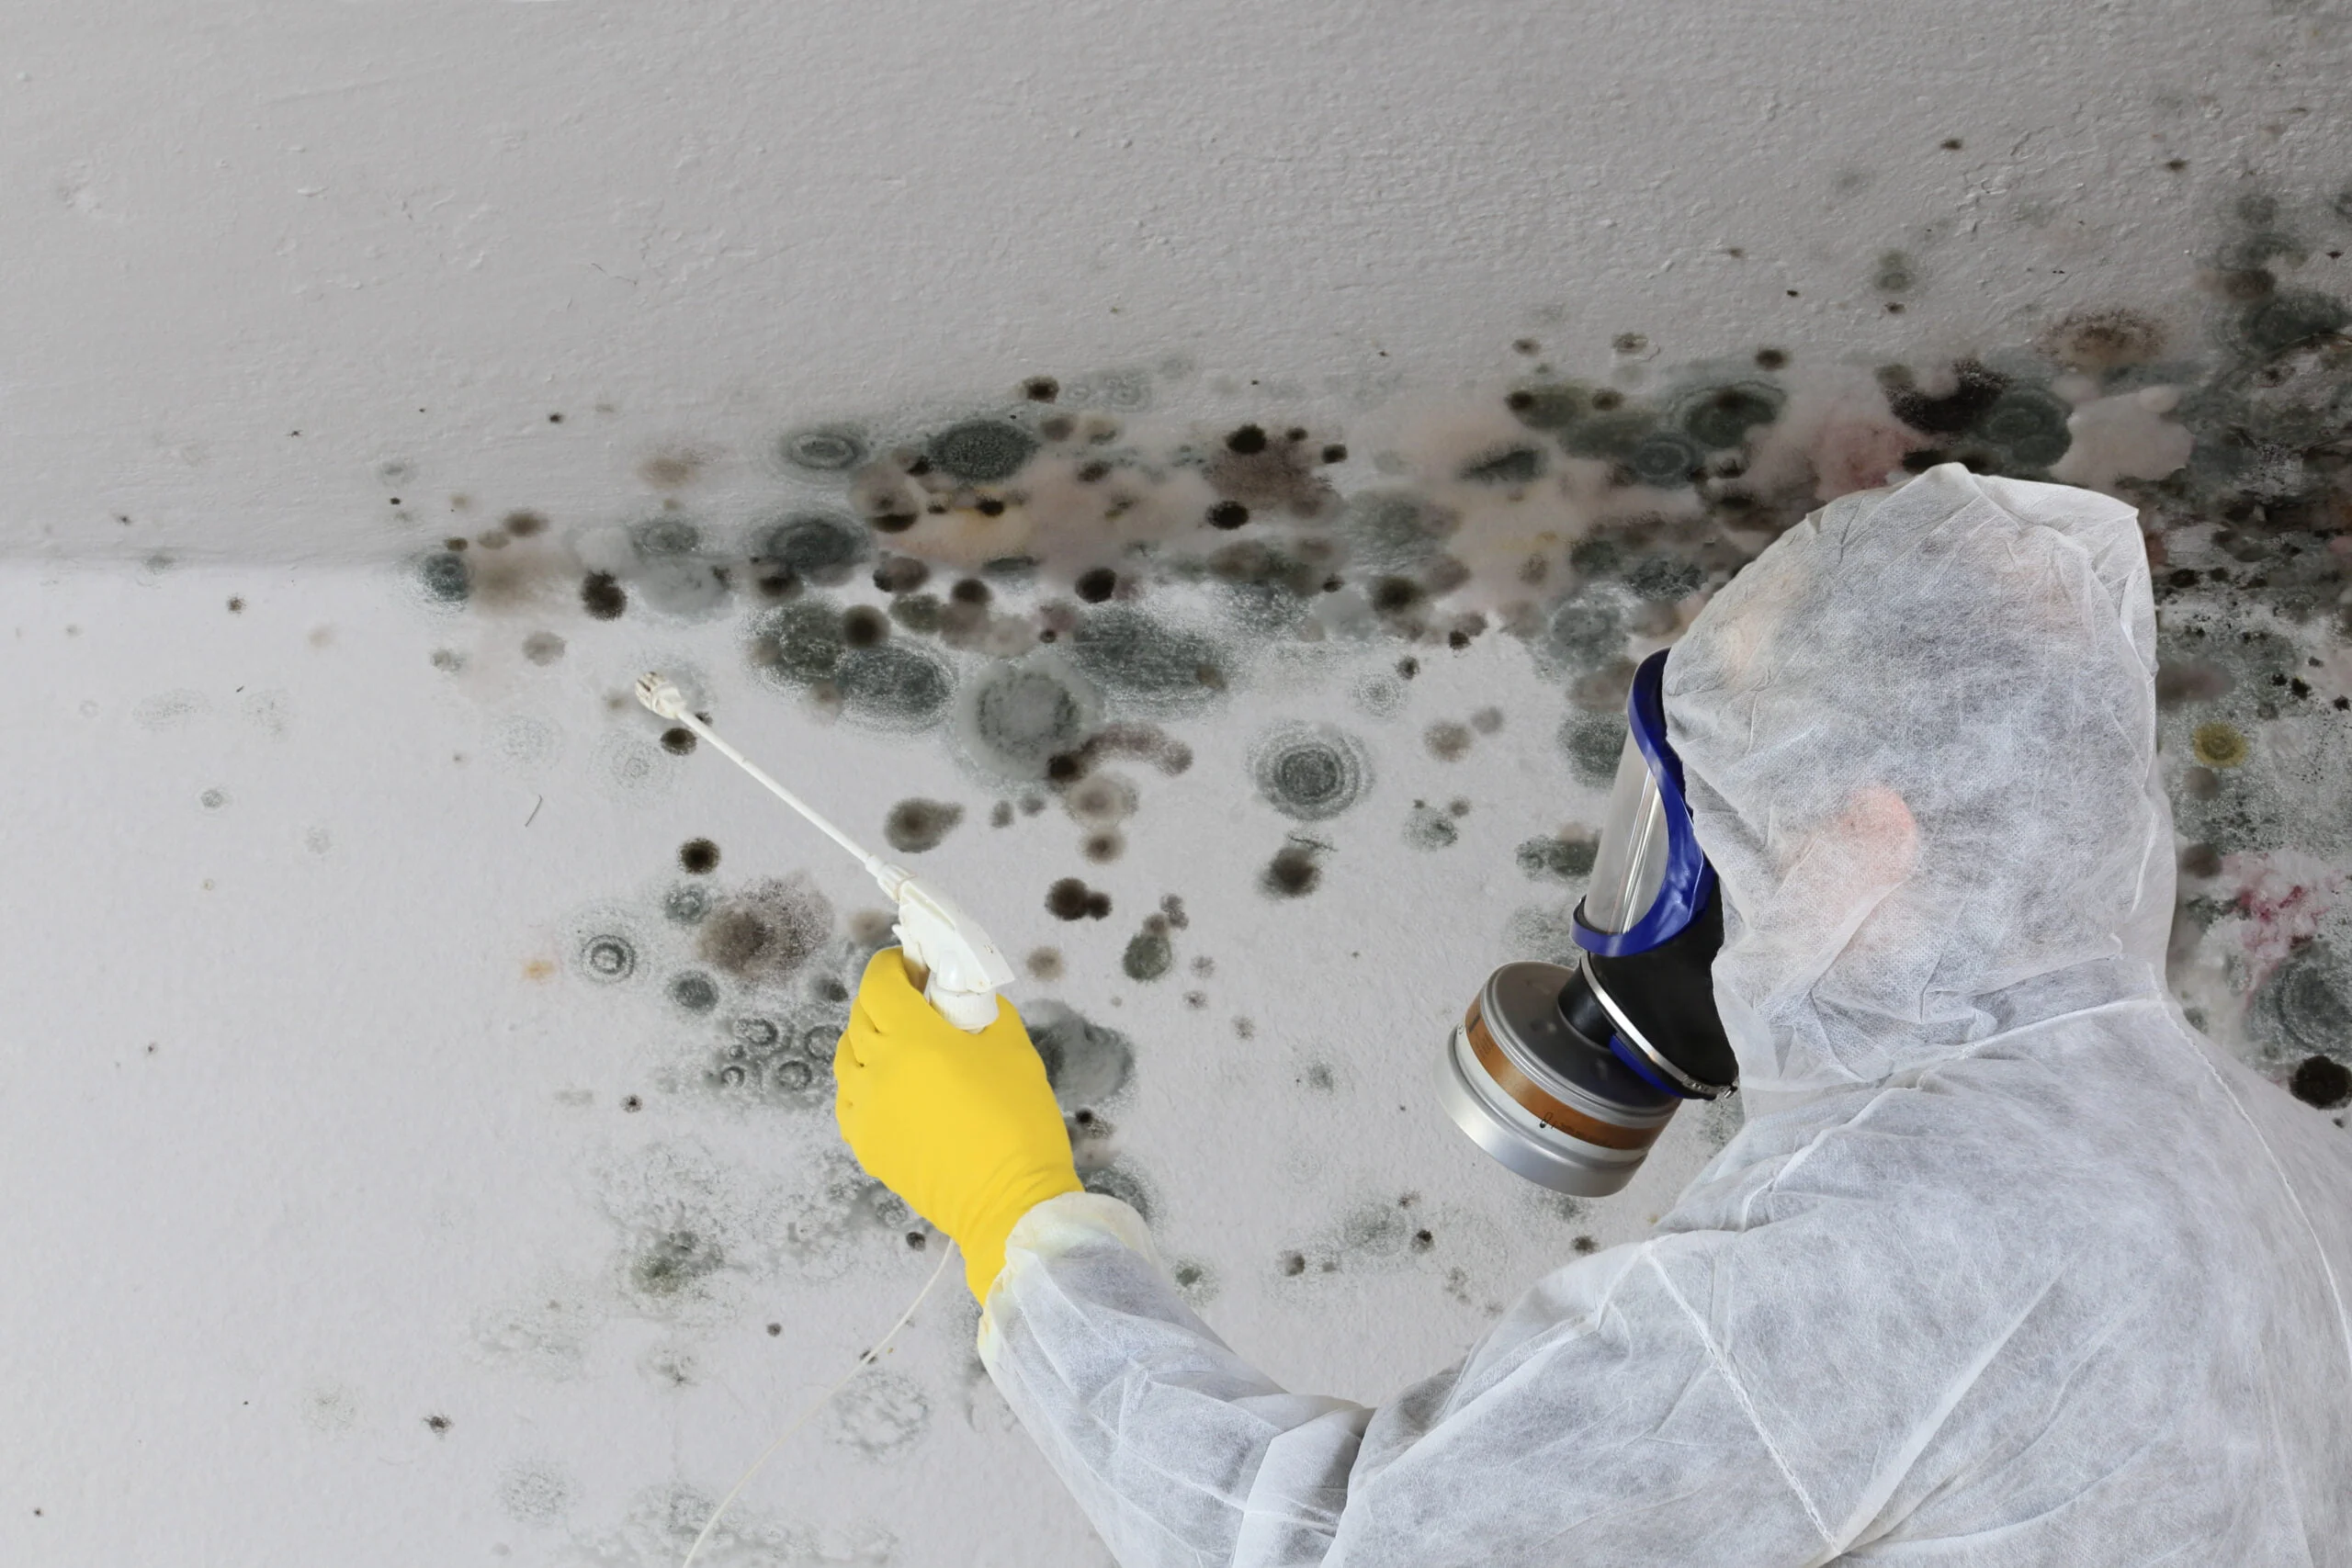
In addition to the water itself, you may have mold to contend with. This adds to the price tag.
Mold removal averages $1100-3300 in 2021 or roughly $10-$25 per square foot. A large-scale job may cost upwards of $6000.
And if that mold gets into your HVAC unit, the costs go up even higher, as much as $10,000.
How to Prevent / Reduce Water Damage
You can’t prevent all water damage events. But you can certainly take steps to prepare for the possibility of water events and prevent further damage. Some water mitigation tools you may choose to invest in ahead of time include:
- Sump pump
- Industrial dehumidifiers
- Water meter key
- Sand or water bags
The Water Mitigation Process (Step by Step)
1. Find the Water Source
If the cause of water damage was a flood, then that source may be obvious. But in other cases, it may be unclear where this water is coming from.
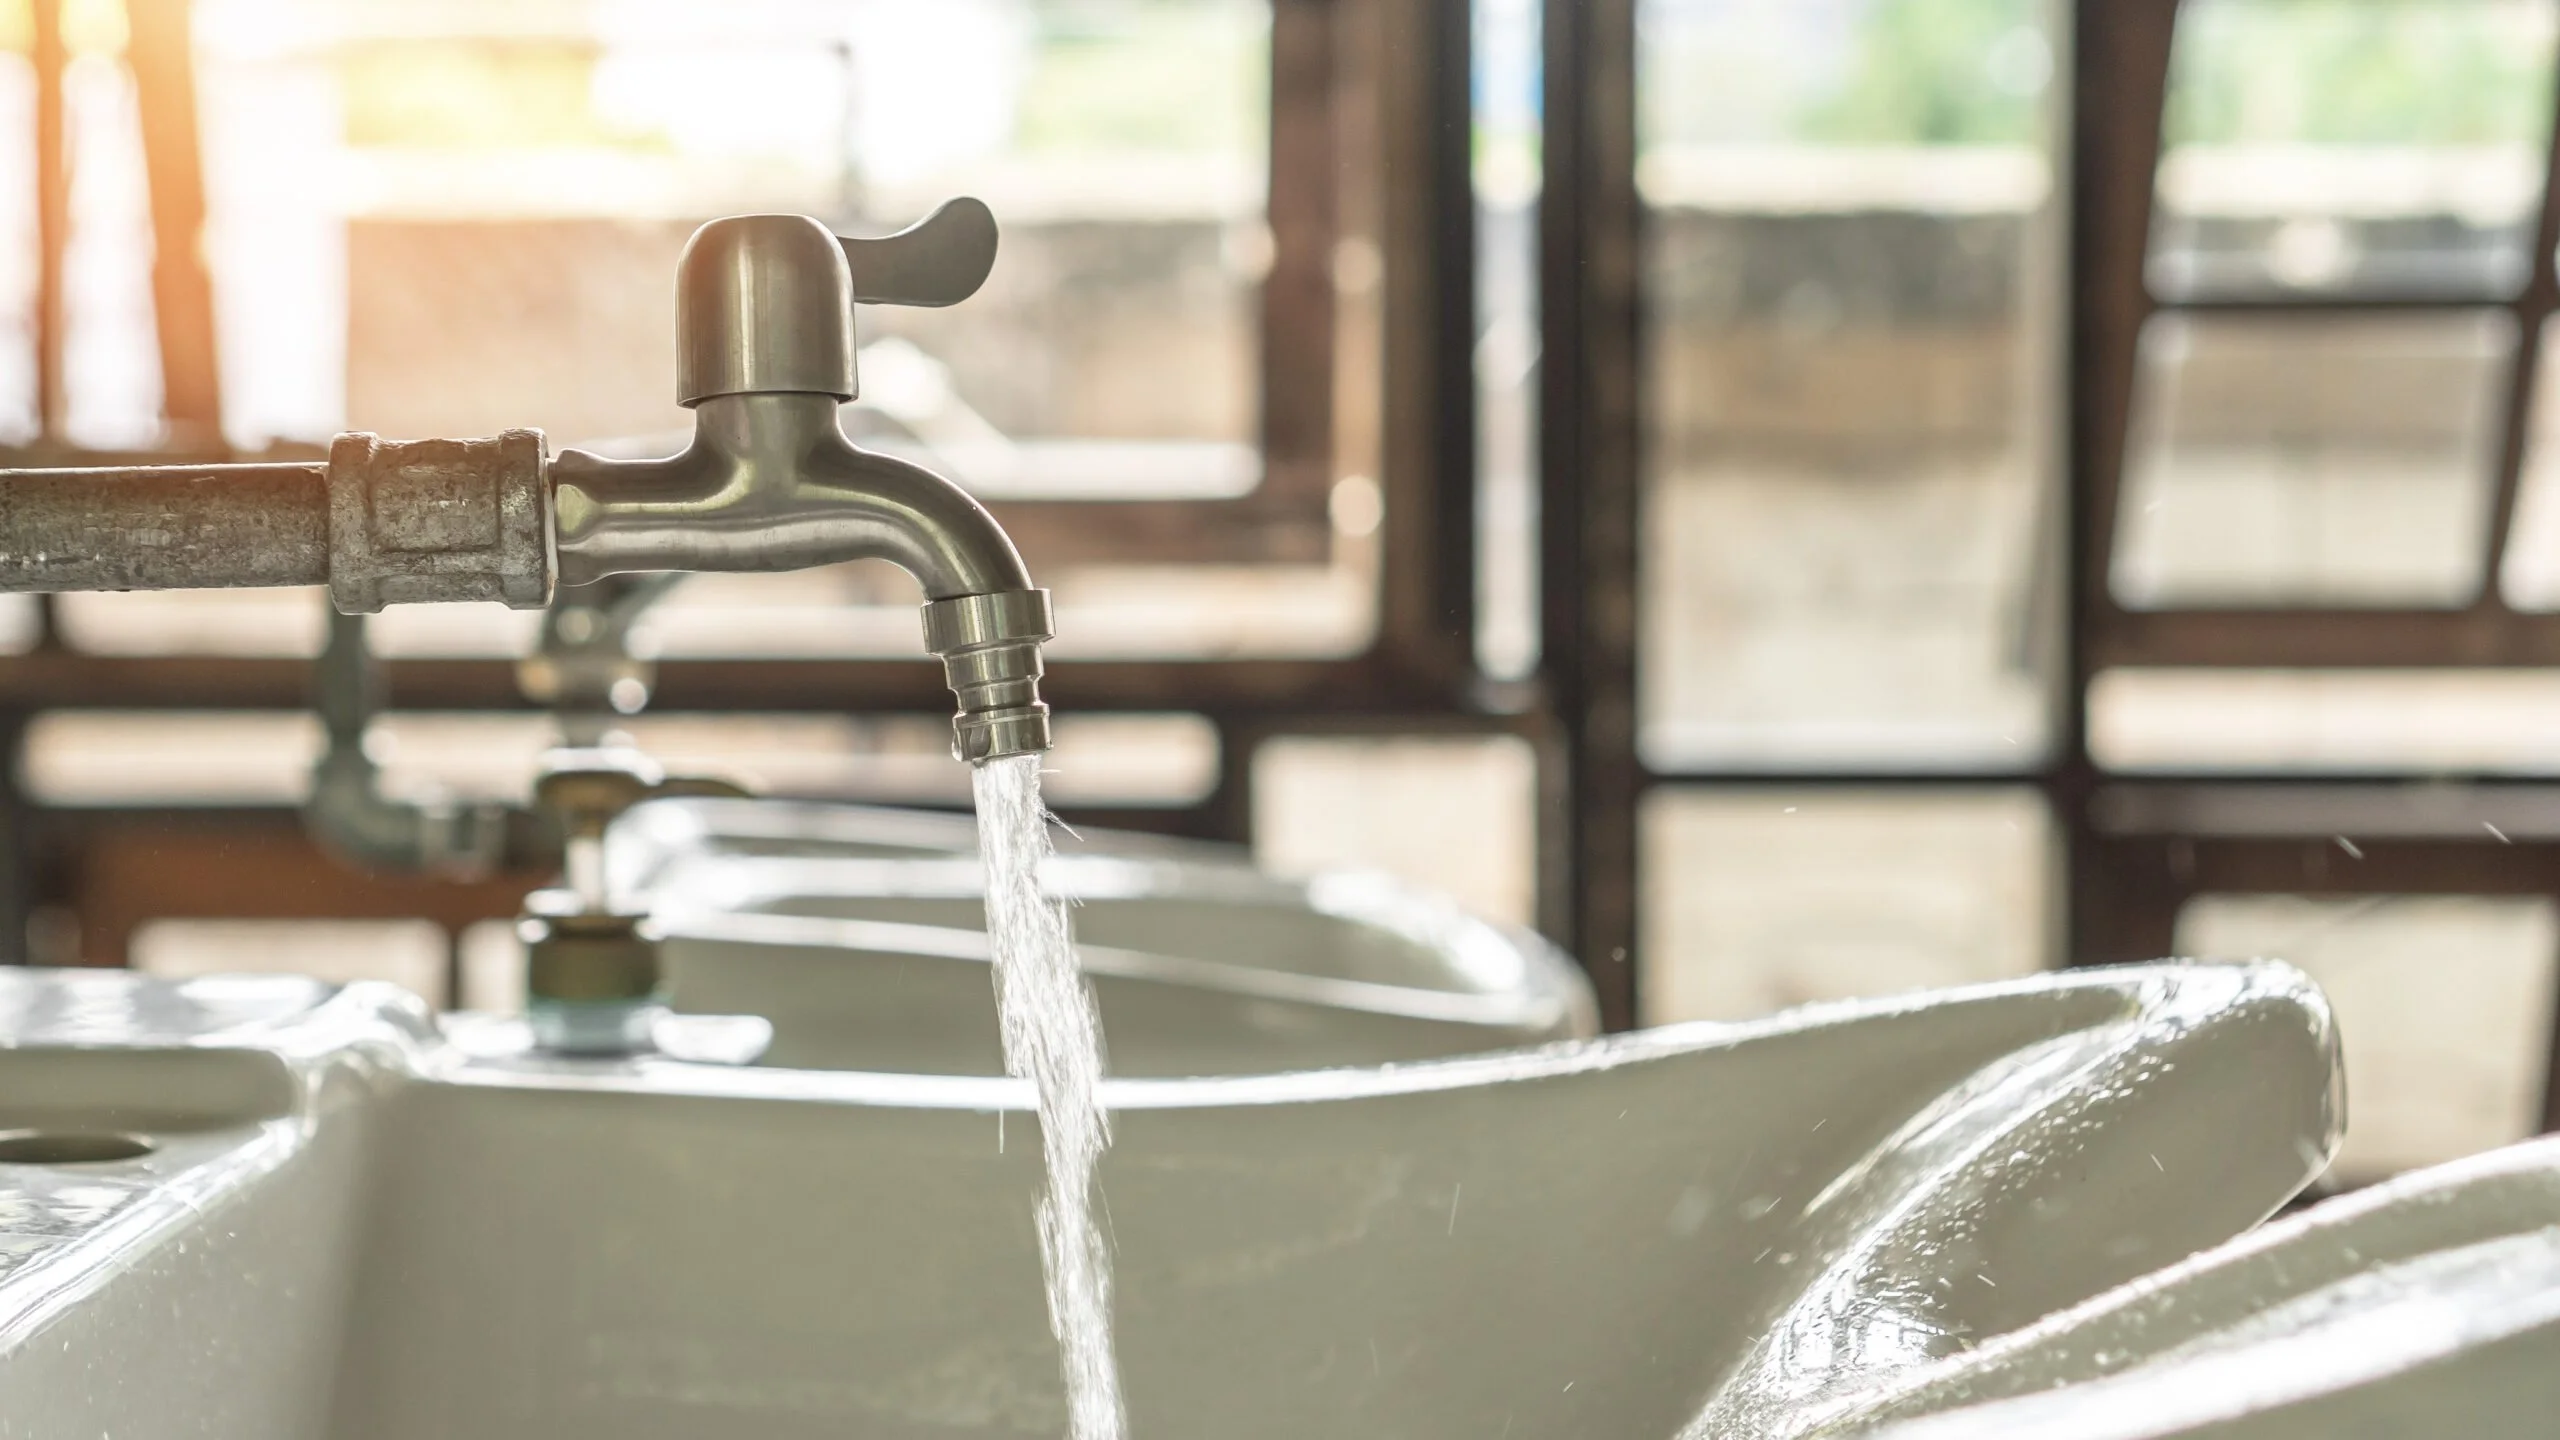
If the source of the leak is immediately apparent, you may also be able to shut off a valve inside your home.
For example, you’ll find the washing machine valve behind your washing machine. The toilet valve shut-off is below the reservoir.
There is a valve under your sinks, and so on. You may or may not be able to reach the valve behind your dishwasher.
If the source is unclear, shut the water off at the Water Meter, which is likely near the street under an iron lid. Ideally, you’ll own a water meter key to lift the heavy lid so you can turn the water on and off before it enters your house.
You can find a water meter key at any home improvement store. They typically cost under $15-$20, so good buy. Alternatively, a screwdriver will often work to pry the lid off.
You may also have a main shut-off in your home. If you don’t know where this is, be sure to ask a plumber next time they’re in your home. They can probably help you find it.
2. Remove Water
If you have a sump pump, begin pumping standing water out of your home. If you have industrial dehumidifiers, you can get these going.
But never ever plug in a dehumidifier or sump pump if you cannot do so from dry land or risk electrocution and death.
If the water is not deep enough for a sump pump are you don’t have this equipment, move to step three.
If you can use a sump pump and/or dehumidifier, start the water removal process, but still proceed to step three to avoid a costly mold situation.
3. Call a Water Mitigation Technician
A water mitigation company acts fast, arriving at the scene of water damage to dry things out and assess the extent of the water’s penetration into walls, ceiling, flooring, etc.
Even if you did have a dehumidifier, it’s critical to get this assessment because what you can’t see can hurt you.
Undried areas can become breeding grounds for black mold and mildew, further increasing water damage cleanup costs.
Now, you’d normally expect a job estimate before water cleanup begins, wouldn’t you? But know that water mitigation is a different animal compared to your usual home services.
There is currently no technology or tool that can accurately estimate how long it will take a large-scale water disaster to dry out or how much of your interior may need to be stripped out to dry it out.
For this reason, you’ll most often receive a bill after the fact, based on the time and resources actually needed to clear the water out.
4. Contact Your Insurance Company About Water Damage Mitigation
Your next call will be to your insurance company. You may or may not have flood or water damage insurance. If covered, they may arrange a place to stay and cover it while professionals take care of the water.
If covered, the insurance company does expect you to take reasonable steps to reduce the amount of damage, such as:
- Shutting the water valve or meter off
- Drying the place out to prevent mold growth
- Putting a tarp over a roof leak
- Contacting a water mitigation company immediately to reduce damage caused by water. See step 3.
They may dispute the cost of water repair if you did not take simple steps like these.
While every policy is different, insurance companies will generally only cover water damage in the following instances:
- Sudden discharge of water, such as a burst pipe as opposed to a slow leak which they would expect you to catch and fix before it causes much damage through basic home maintenance.
- Storm-related water damage, excluding flood damage. Ex: a tree falls on your house and destroys your roof during a storm.
- Accidental sewer backup or overflow, which may also require a rider on your policy
- Flood damage, but only if you have a flood damage rider, which costs extra and may not be available in areas where flooding is common.
Even if you think insurance doesn’t cover it, it’s a good idea to contact them to be sure. You’re paying for coverage and don’t want to leave money sitting on the table.
Your agent can help you understand what your policy covers, so you’ll know if it’s worth your while to file and claim and get an insurance adjuster out there.

5. Water Cleanup Setup Process
Next, your mitigation company will prepare your home for water mitigation equipment. They cannot set up their equipment to remove the water and assess the damage until they take this step.
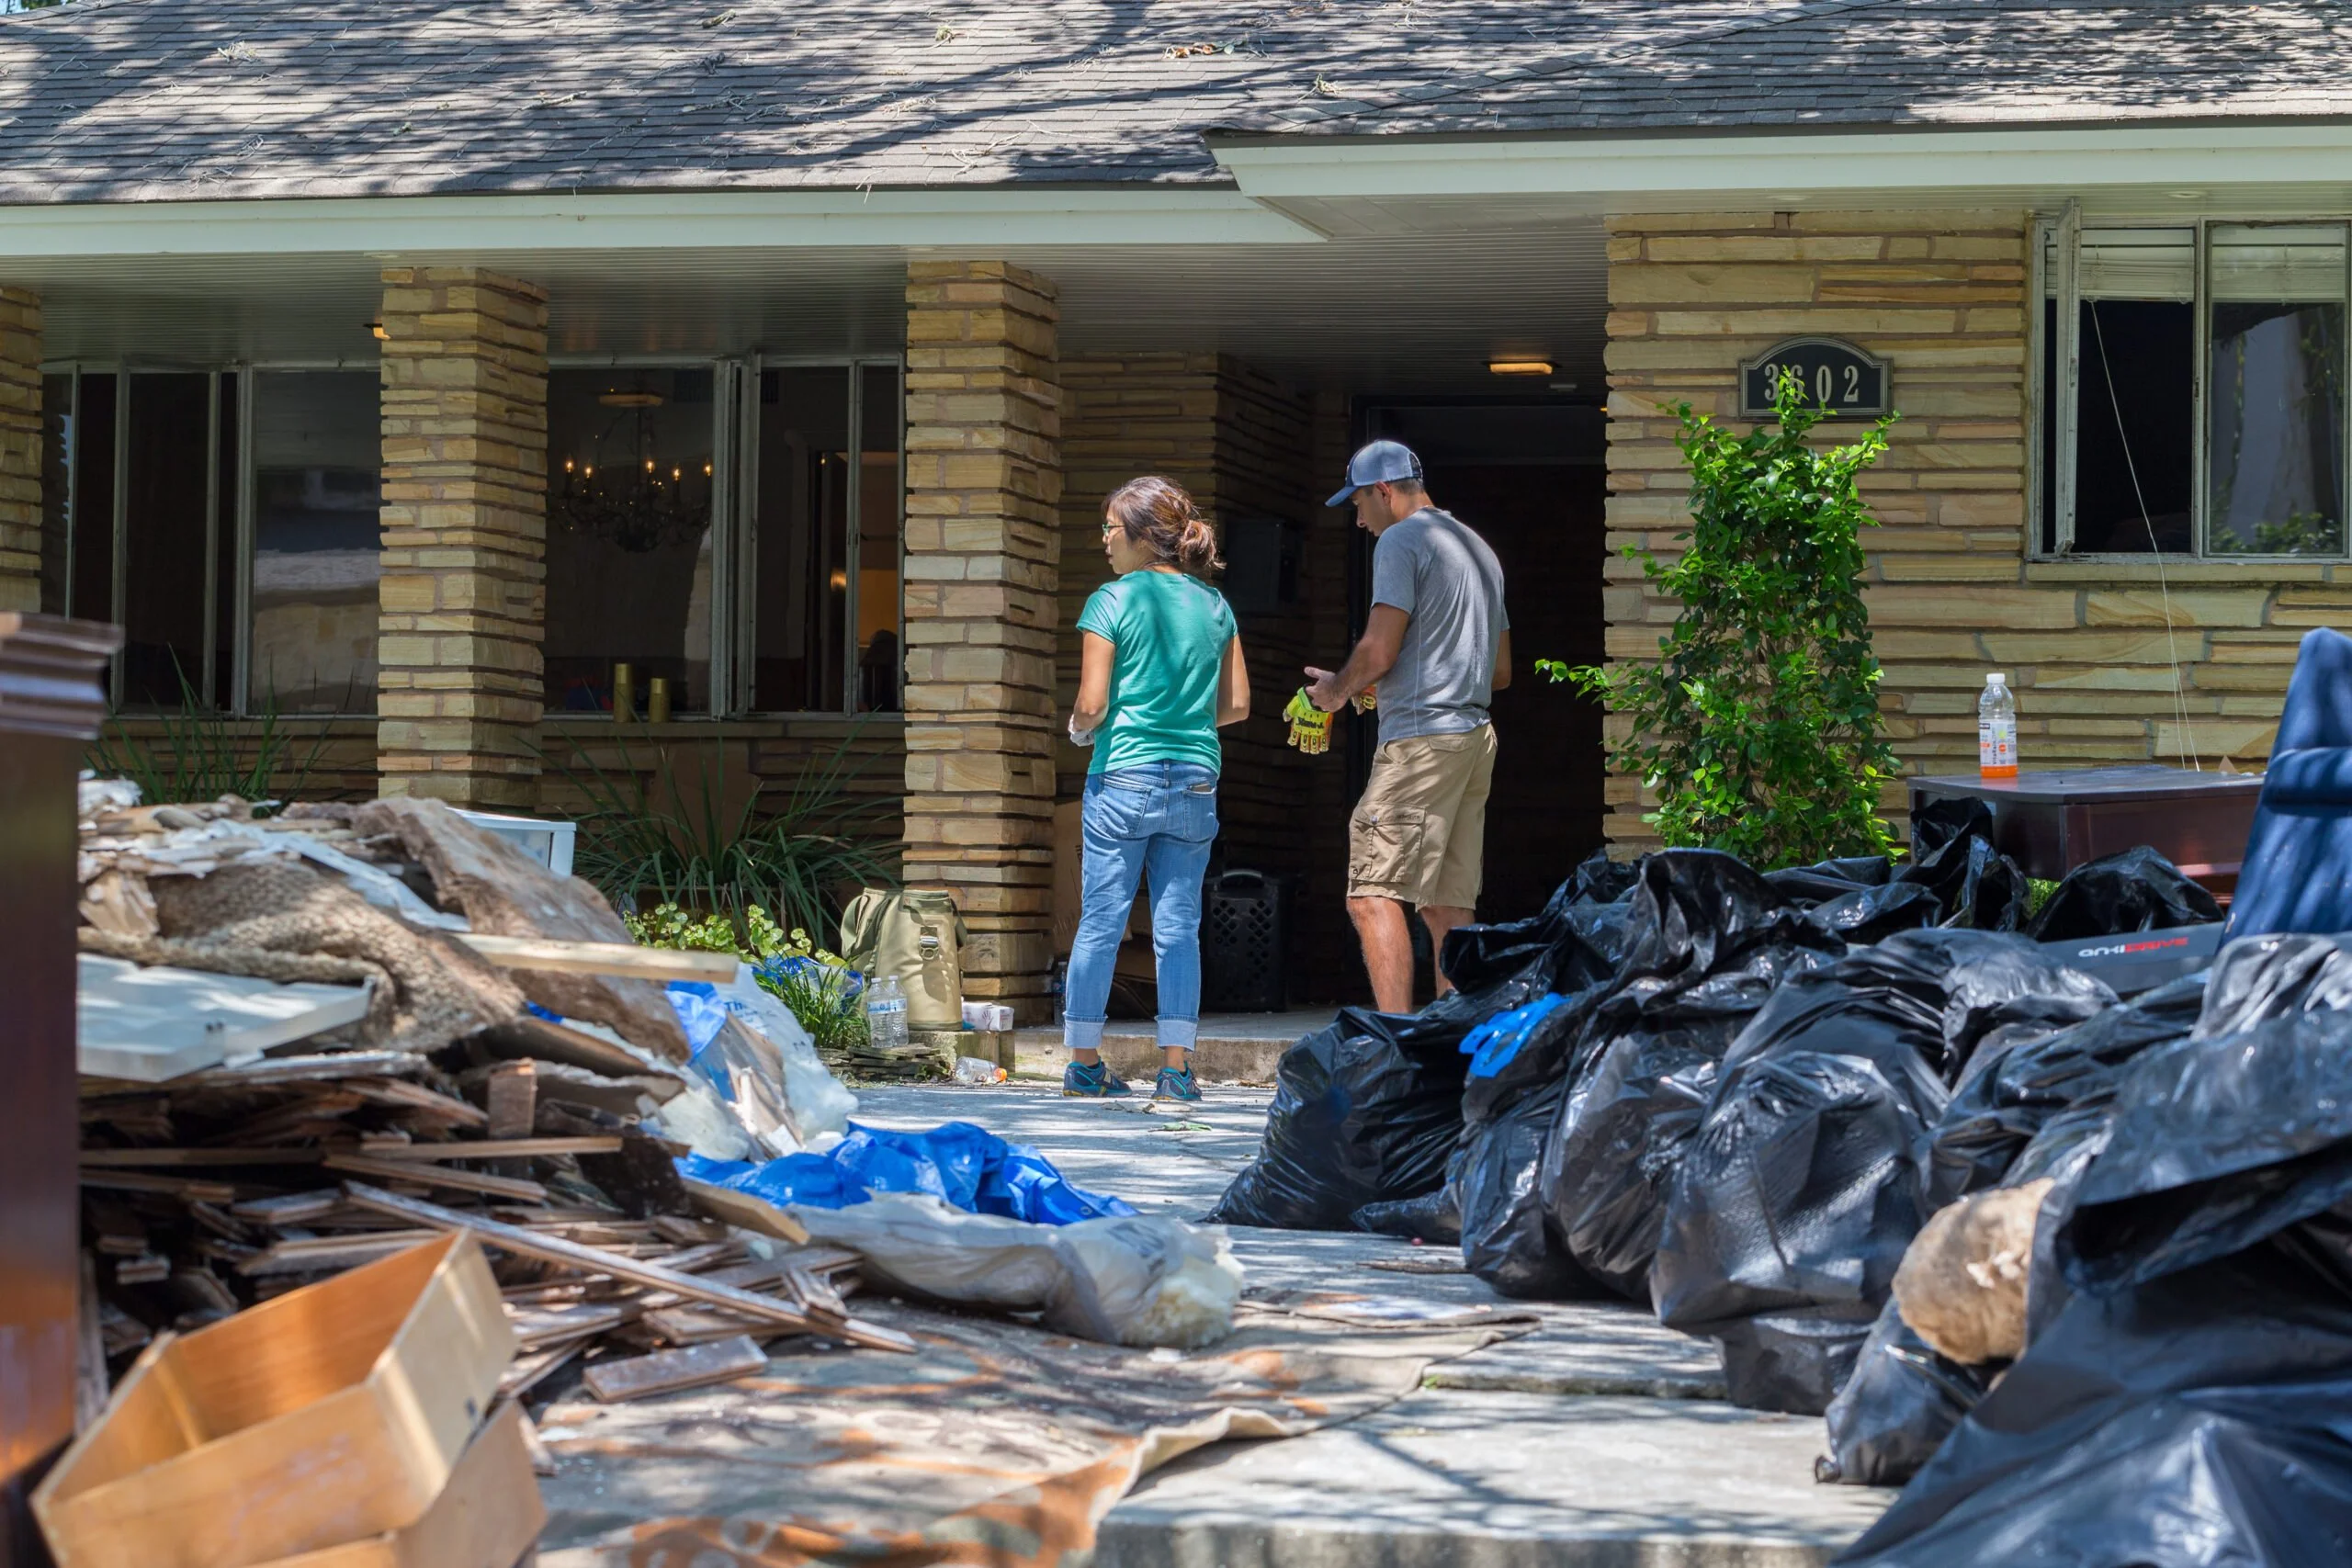
Sadly, this may involve removing drywall, baseboards, flooring, and even portions of the ceiling if the leak was upstairs.
But don’t let that scare you. A water mitigation technician is trained to assess water damage externally first and limit parts of your home they must remove to address the water.
And in some cases, removing the drywall from one wall strategically will allow the techs to access the dampness and reduce the number of walls that have to come down.
On most homes, outer walls contain insulation that will suck up and retain liquid, so outer drywall will almost always need to be removed. Then the techs can pull out the wet insulation and dry the space out.
Some floorboards may have to come out to maximize airflow on both sides of the walls.
These seemingly drastic actions must take place to speed up drying out because a slow dry is a recipe for mold, mildew, and an even more costly problem.
6. Water Cleanup Equipment Setup
Now, that they’ve prepared the area, they can begin setting up cleanup equipment. The equipment needed depends on the amount of water damage and may include some impressive devices like:
- Industrial Dehumidifiers – Unlike home dehumidifiers, these are designed to eliminate significant water in a shorter period of time. Dehumidifiers vary in size and how quickly they can eliminate moisture based on room size and how wet things are. Proper Dehumidifier size is critical to the water cleanup because if a dehumidifier is too big, it can unintentionally suck moisture out of solid surfaces like the ceiling or wood floor. This would make them crumble. Then, of course, if it’s too small, it takes too long to do the job, allowing opportunistic mold to take hold.
- Desiccant Dehumidifier – An industrial dehumidifier that works in extra wet places like a flooded basement
- Air scrubbers – A filtering device that attaches to your air conditioner’s ductwork. It removes moisture while filtering out contaminants like mold spores, mildew as well as years of unrelated buildup like pet dander, dust, allergens, pollen, etc. A water mitigation company also uses these devices to remove debris from the air created during drywall demolition, which may include asbestos.
- High-velocity air dryers and air movers – These dryers remove moisture from places they might try to hide like under your kitchen cabinets. Once that moisture is out of these tight spaces, the industrial humidifiers can get rid of it.
- Thermal imaging camera – Lets a tech see if something is wet or dry based on how it holds or releases heat. Techs aim the device at surfaces around the home to assess if the water dry out is working and how it’s progressing.
- Non-invasive moisture meter – As mentioned above, every solid material naturally has moisture in it, and you don’t want to overdry it. This device assesses the precise moisture level in various surfaces, so your granite countertops get to the right moisture level, and so does your drywall.
- Invasive meter – This meter checks the core moisture of materials that you can penetrate like wood beams.
- Atmospheric readers – This device checks temperature and relative humidity in different areas to assess parts of a home that need more attention.
7. The Dry Out
With all of the above equipment strategically placed, it’s time for the dry-out to begin. Once dry-out begins, the use of the meters and readers listed above guide the process so the techs know if more surfaces need to come out to complete the drying.
Areas that need extra dry out get marked for additional attention.
For larger jobs, techs will leave their equipment in your home during the dry-out and check back at least daily to assess progress. On average, it takes a home about four days to dry out using these methods.
8. Antimicrobial Spray
This is typically an optional service you may want to consider. Despite how quickly you dry out a home, mold can take hold in the last bastions of wetness, and you won’t be able to see it until it’s well-established.
Additionally, standing water may have come in contact with black water (sewage), cat litter, the toilet, or even shoe residue, where the water picked up bacteria that can then settle on the floor in other rooms.
For these reasons, techs will spray anti-microbials in your home to kill any such organisms so they can’t make your family sick.
9. Before and After Comparisons
Generally, around day three, a technician will compare the atmospheric before and afters. The difference between the two should be significant at the point, and the tech can assess how much longer machines need to run to thoroughly dry out the space.
If on day three, certain materials continue to hold onto moisture, then a tech will remove them to allow the process to continue.
You’re sacrificing pieces of your home to save a much as possible. This can be heart-wrenching to watch, especially if techs decide to remove more walls after three days. But it’s all part of the water mitigation process.
10. Customer Walkthrough
During the water mitigation process, you likely steered clear of your home. Now, it’s time to return for a walkthrough. A tech will take you to the affected areas and show you readings to reassure you that the home is now dry.
It’s important to prepare yourself mentally for this walkthrough. If this is the first time you’re seeing your home, keep in mind the above steps. You may come home to significant home damage that was necessary to complete water mitigation.
11. Water Mitigation Completion
The role of the water mitigation company is now complete. If you have coverage, they will submit it directly to your insurance company, and you may owe a deductible, which you pay directly to the company.
12. Schedule an Insurance Adjuster Walkthrough
Assuming you have insurance coverage, the insurance adjuster now schedules a time to come out and inspect the work to make sure it’s up to their standards. They then pay the claim based on your contract.
13. Find a Water Restoration Company
Your water mitigation company cleaned up the water. But they may or may not also handle the water restoration.
If they do, you can work with their contractor. If not, this may be working with separate restoration professionals for the restoration process.
When you schedule this meeting, plan to have the insurance adjuster and the company doing the restoration arriving at the same time.
This will allow the adjuster to speak directly with the contractor and make sure everyone is on the same page.
Keep in mind the goal is to get your home back to pre-damage condition. If you plan to update or improve, plan to pay extra out-of-pocket.
But know it’s perfectly fine to take this opportunity to update, if, for example, the kitchen cabinets had to be ripped out or you want better flooring than you had before.
You’ll get a job estimate. Restoration work begins.
Does Water Damage Decrease Your Home’s Value?
It certainly can in some instances like:
- A shoddy water restoration repair job. It’s critical that you work with people who are licensed and insured in mitigation and/or restoration. An IICRC restoration certification is one credential to be on the lookout for.
- Signs of recurring flooding. For example, your basement floods a couple of times a year during big storms.
- Failure to reduce further damage by trying to dry the home out yourself and assuming if it looks dry, it is dry throughout
- Waiting to contact a water cleanup for several days
- Taking the insurance money but failing to actually do the repairs
How to Sell a Home with Water Damage?
You have several options here, depending on your situation.
Fix It Up and Sell It
If you have the funds or insurance is covering the cleanup and repair, you may choose the pay the cleanup and restoration costs. Make sure you hire a decent contractor and get a quality restoration.
Repair and update any other areas of the home that may need improvement. Then put it on the market.
If the damage was caused by recurring flooding, keep in mind that you are ethically and legally required to tell the homebuyer.
It’s also important to note, and typical homebuyers don’t want a half-finished home. So this is an all-or-nothing proposition.
You’ll need to take the time and spend the money to make the home market-ready. This may require significant upfront costs, which you may or may not recoup during the sale.
Sell It to HomeGo Instead
We have an easier idea for you. Why not sell it to HomeGo?
HomeGo’s agents can complete a walkthrough of your home and provide you with a solid cash offer for your As-Is home you can believe in. This isn’t the kind of offer that changes after you start the process.
We’re experienced buyers and our agents know what your home is worth. We’re confident they can quote you a firm and fair price, often the same day. And we stand behind their valuations.
Once you accept the offer, HomeGo can close in as little as one to two weeks. You get the cash and can use your home’s equity to buy another home in cash, or do whatever you want with it. It’s your money.
To learn more about how we can help you move on from this devastating event by buying your home As-Is and fast for cash, start by filling out the form.